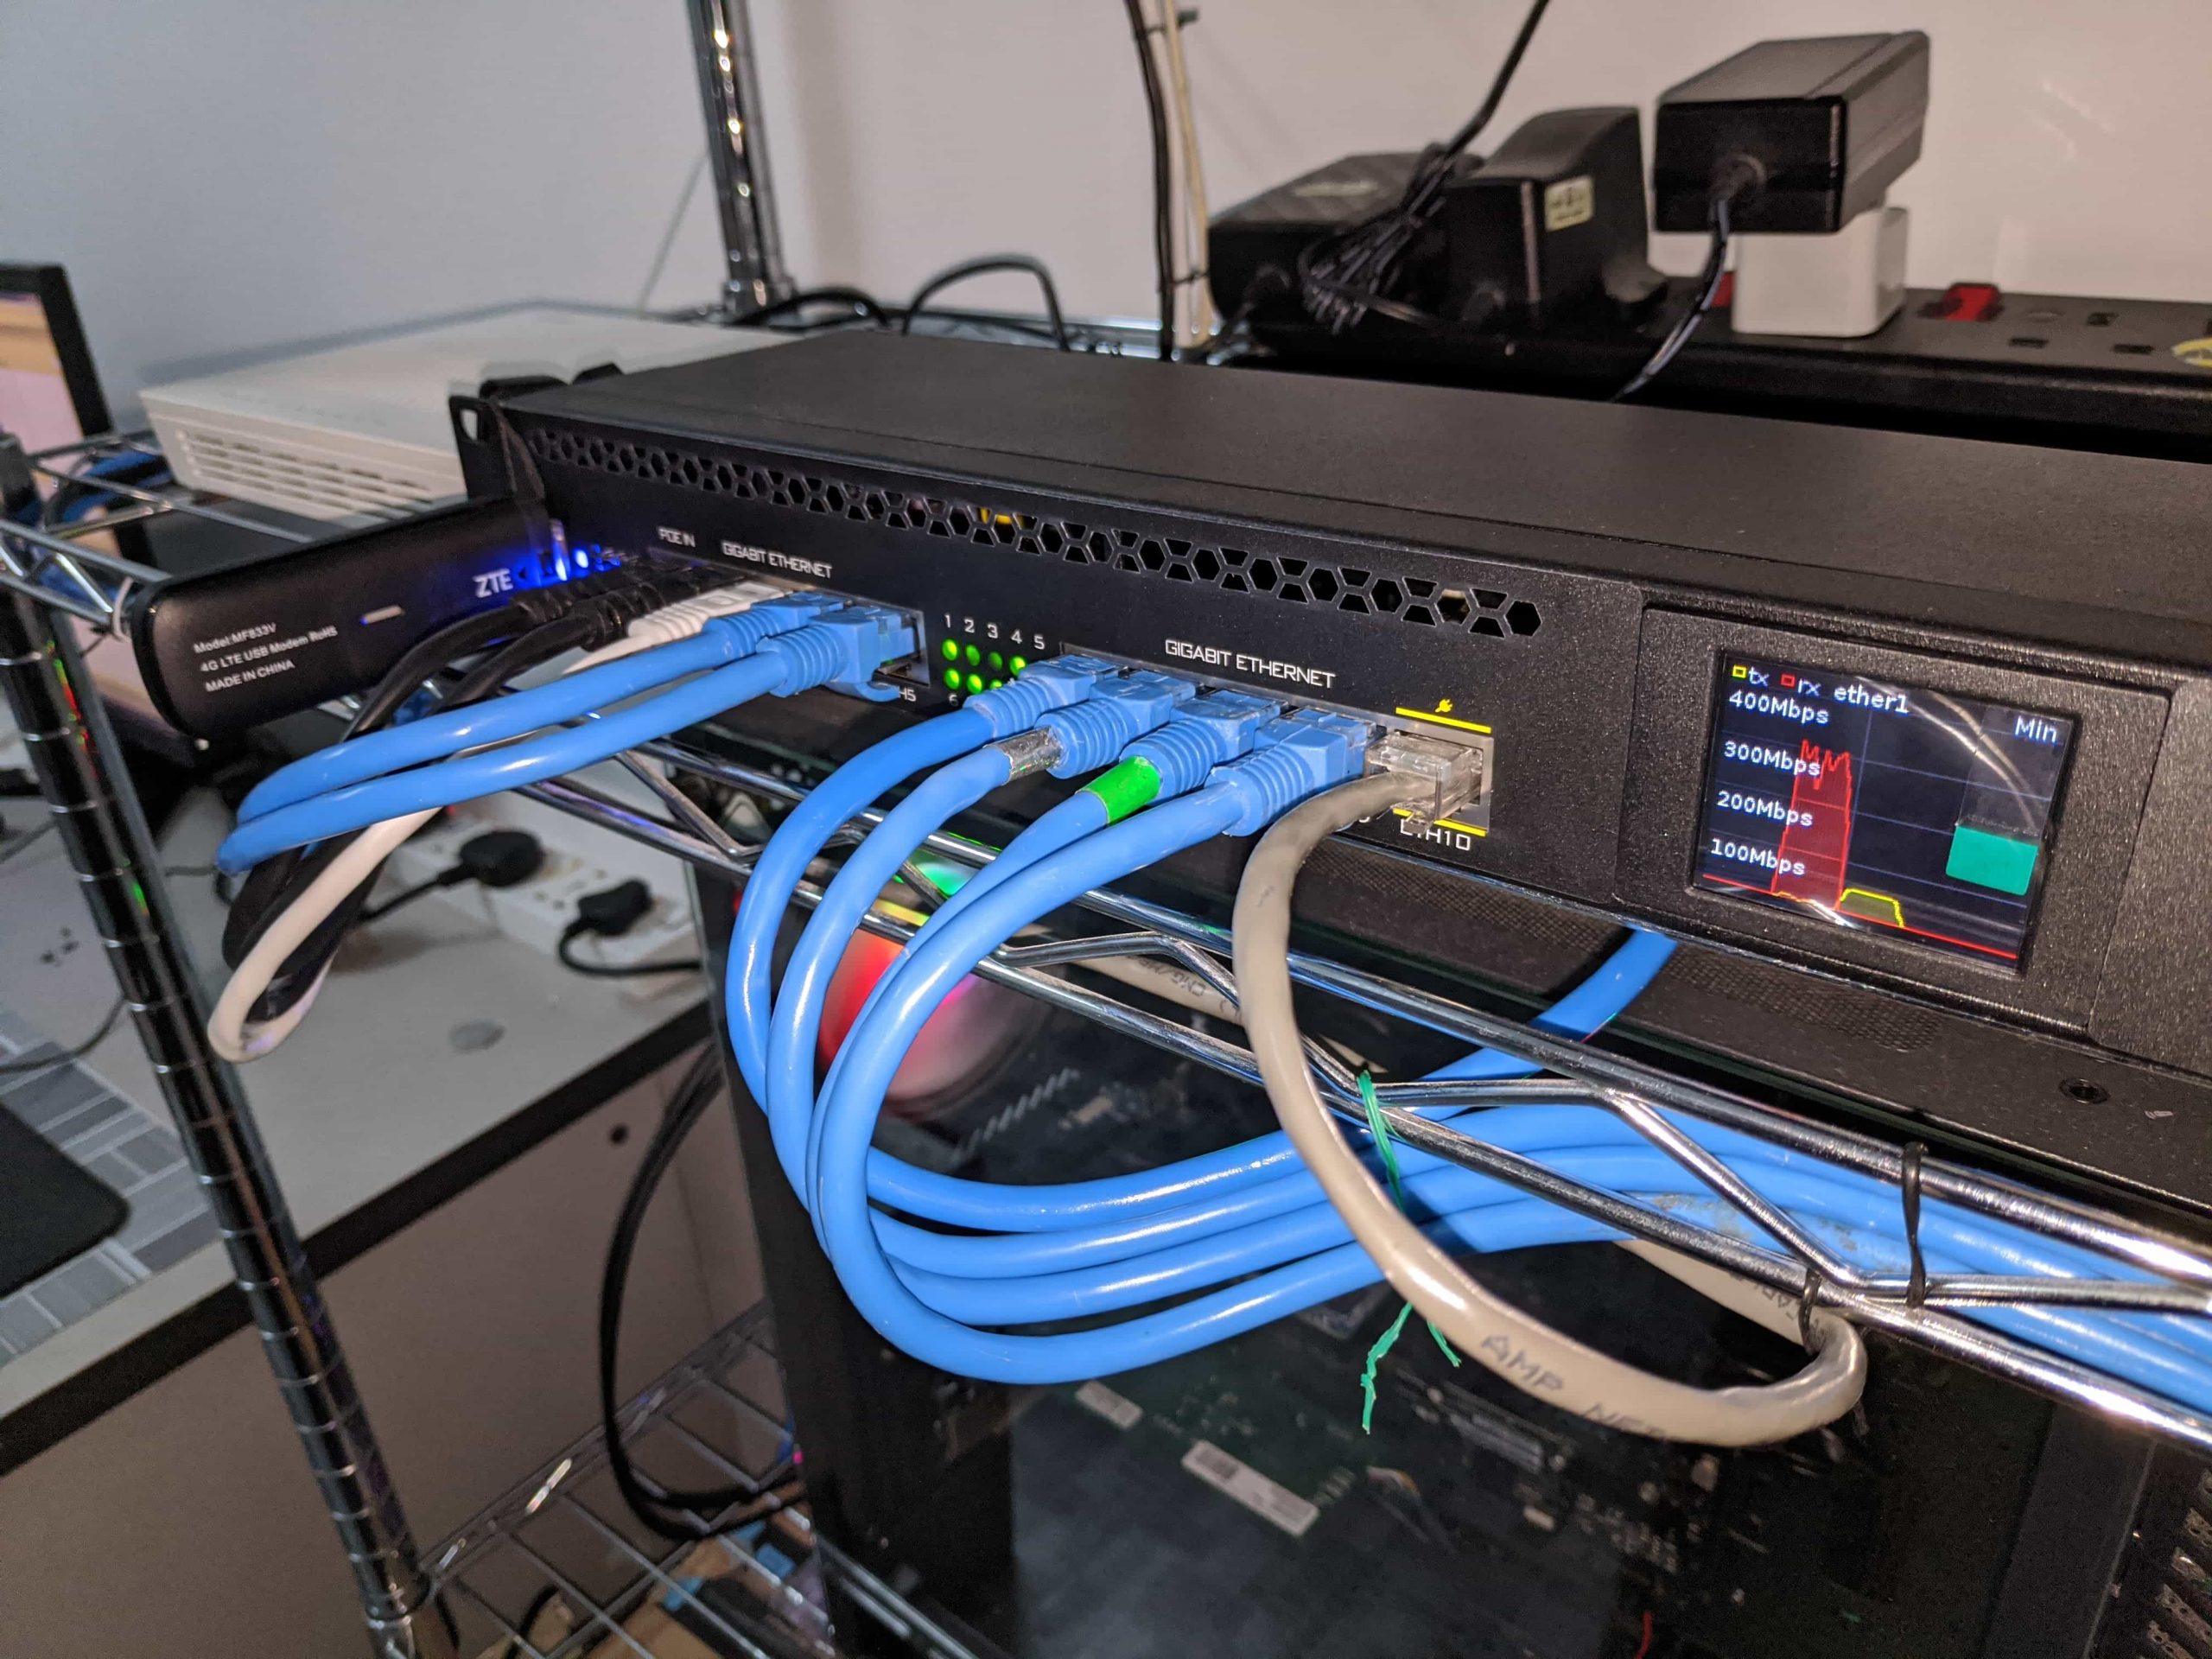
Yesterday, I received awesome Router from my friend, Nemu
This is my first time to configure Mikrotik, I do my best!
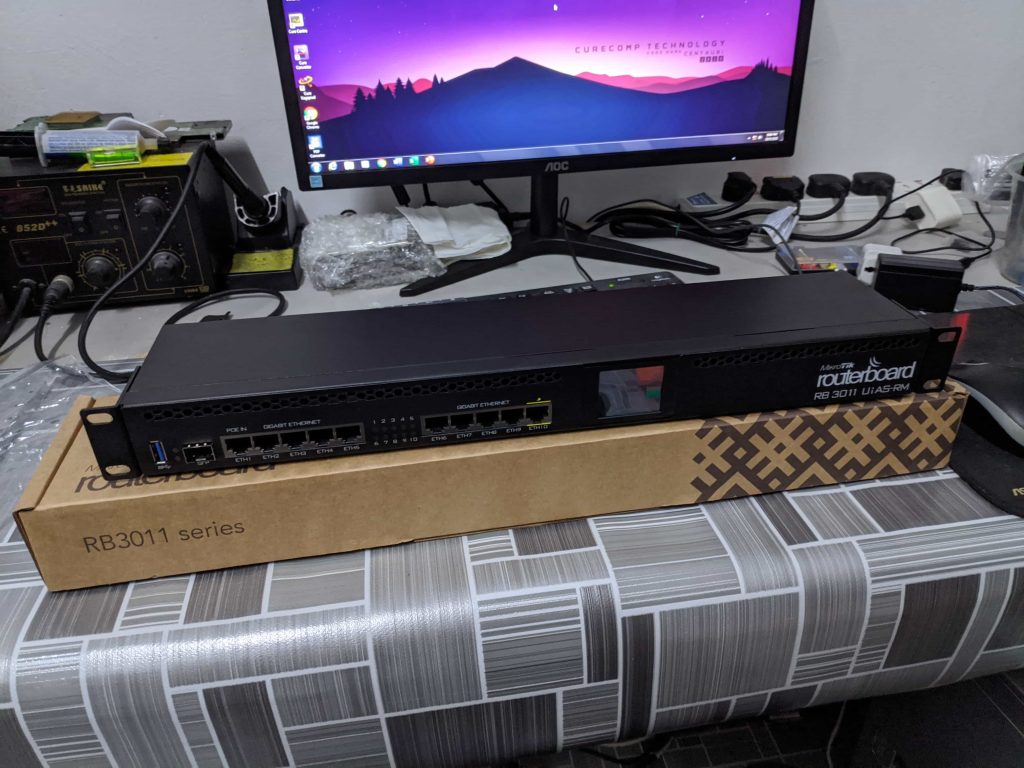
First Time Setup
Download WinBox
RB3011 has WebUI to configure this router, however, it’s better that you download WinBox and configure from that application,
By default, Mikrotik use 192.168.88.0/24 for LAN, I going to use this default.
After you done download WinBox, open it and login via MAC Address (just in case that you screw up and can’t access by IP Address)
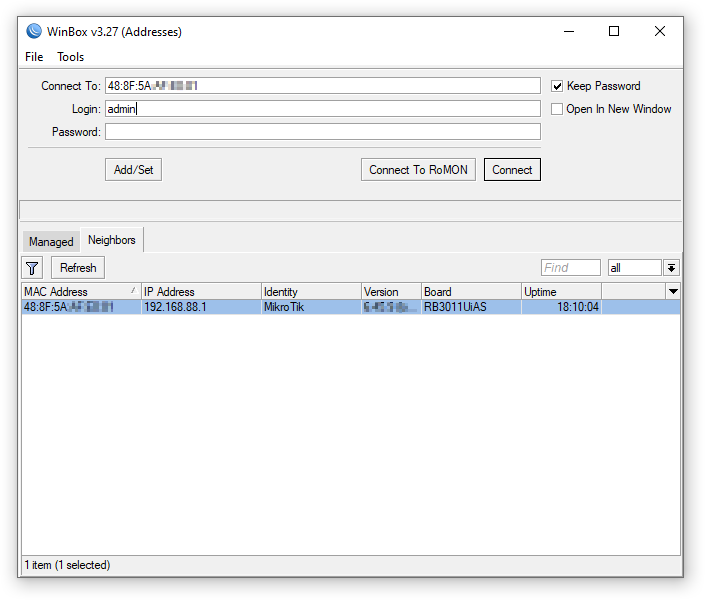
Login your router with blank password for first time.
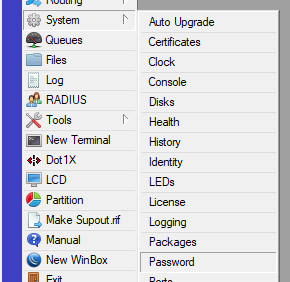
Change admin password
Since you login without password, set a password first. Navigate to System > Password
Leave default password blank and enter new password, and click OK.
Connect The Maxis Fiber Internet
In this guide, I show how to configure Maxis while keep VoIP function
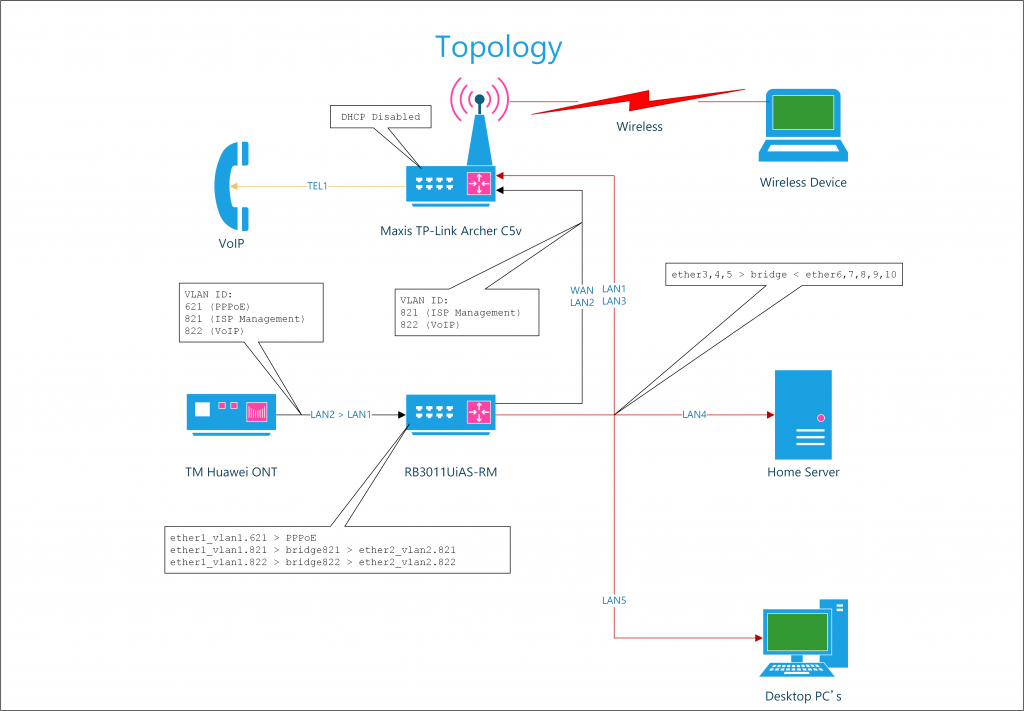
Configure VLANs
Maxis riding on TM Unifi network are using VLAN 621 for Internet
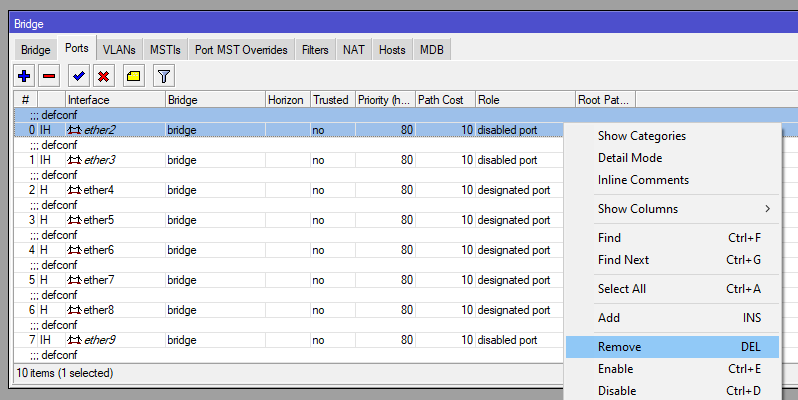
By default configuration, ether1 was not part of any switch bridge, we need detach ether2 for bridge VLAN 821 & 822
Add VLAN
VLAN ID      Info                           Comments
-------      ----                           --------
  621        Internet via PPPoE             Main Internet
  821        ISP Management                 This management bridged
  822        VoIP                           This VoIP will bridged
  823        IPTV                           >not covered in this guide<
Go to Interface > VLAN tab, add few VLAN:
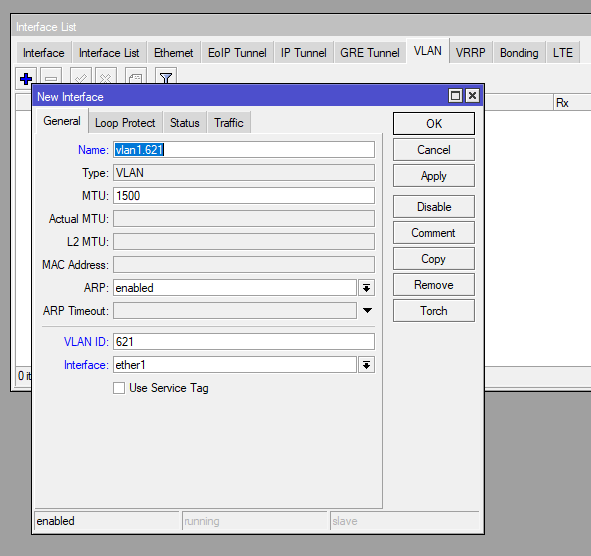
Internet
Name: vlan1.621
VLAN ID: 621
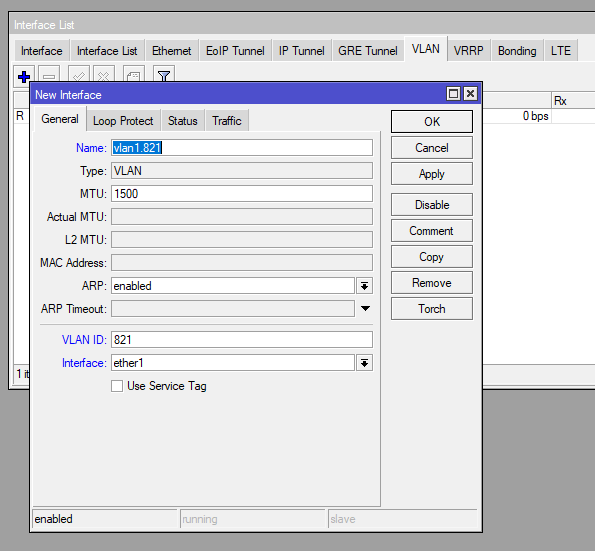
Interface: ether1ISP Management
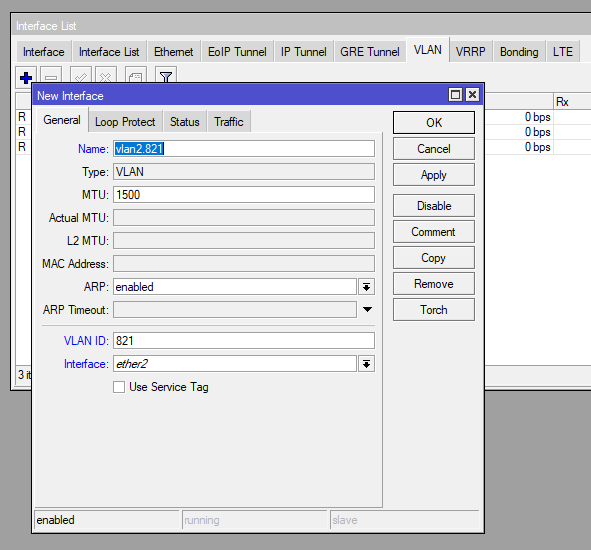
     Name: vlan1.821
  VLAN ID: 821
Interface: ether1
Name: vlan2.821
VLAN ID: 821
Interface: ether2VoIP
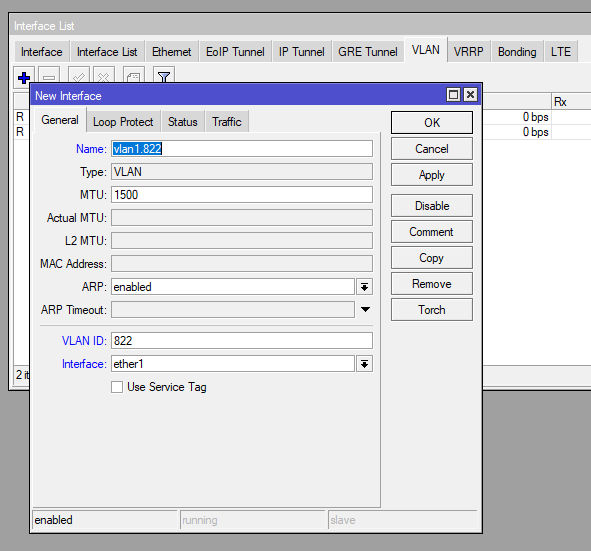
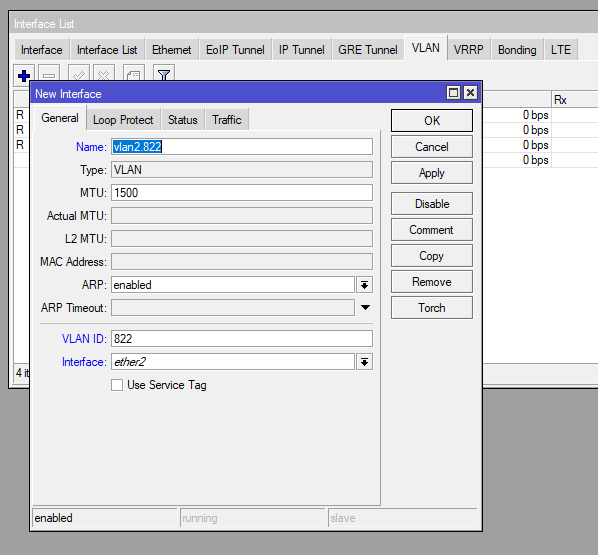
     Name: vlan1.822
  VLAN ID: 822
Interface: ether1
Name: vlan2.822
VLAN ID: 822
Interface: ether2Bridge VLAN
VLAN 821 and VLAN 822 will get bridge to ether2 port, then connect to WAN Maxis TP-Link Router
Create Bridge
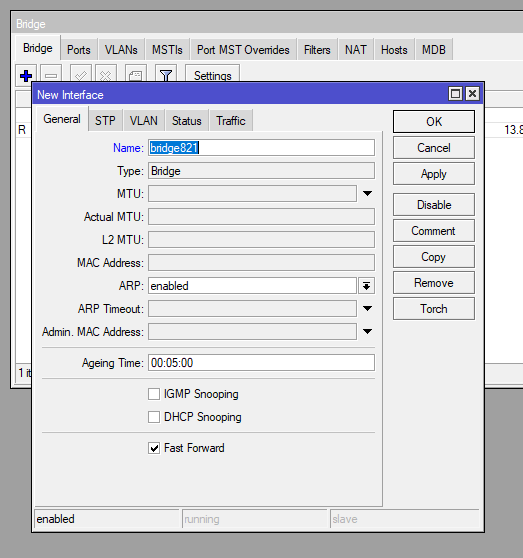
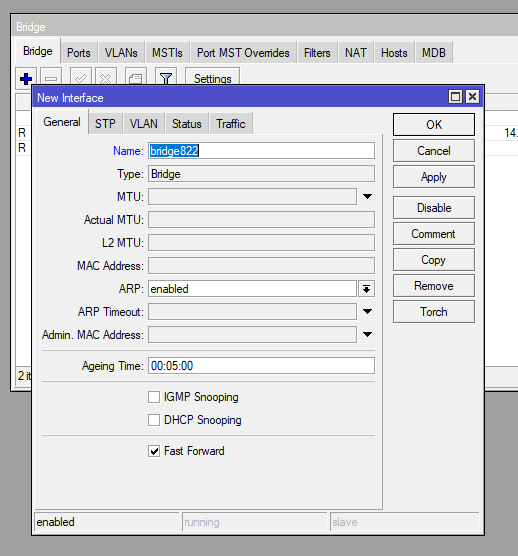
Create 2 bridge interface:
Name: bridge821Name: bridge822Assign Ports for VLAN interface:
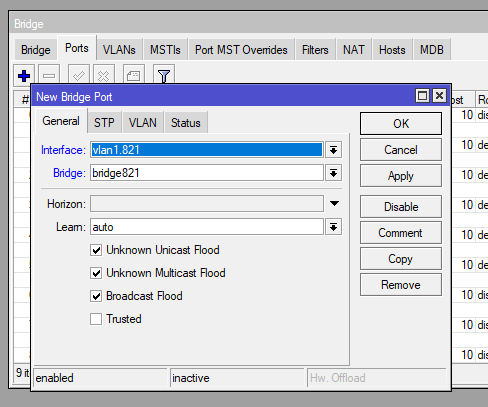
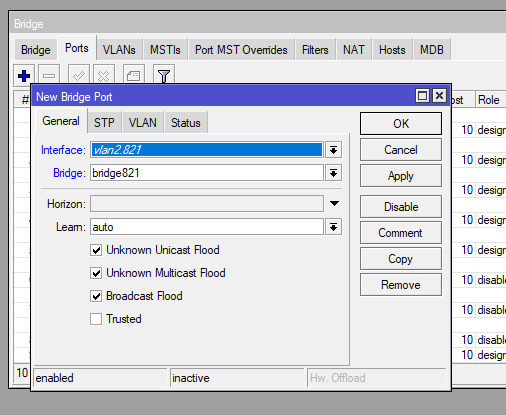
VLAN 821
Interface: vlan1.821
Bridge: bridge821
Interface: vlan2.821
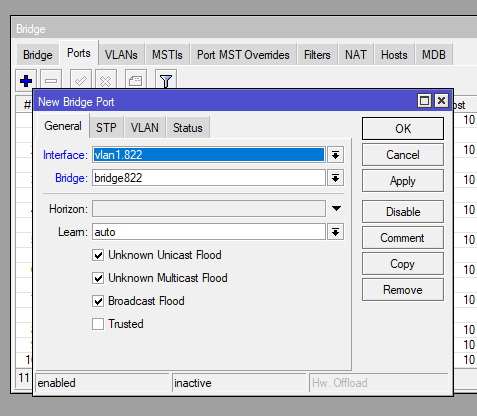
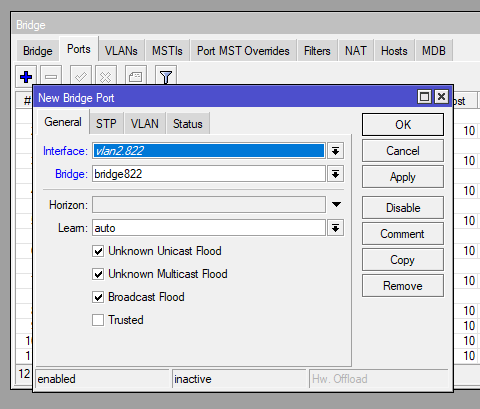
Bridge: bridge821VLAN 822
Interface: vlan1.822
Bridge: bridge822
Interface: vlan2.822
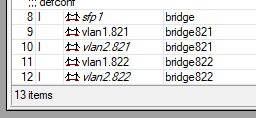
Bridge: bridge822When complete, it should look like this, and VLAN will get bridged to LAN 2
Connect the Internet!
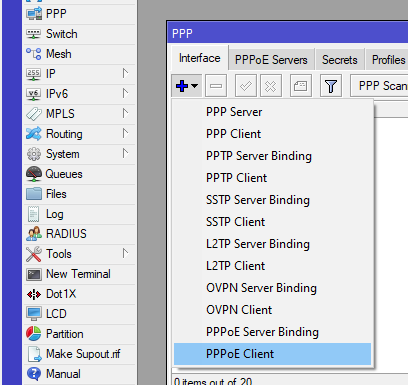
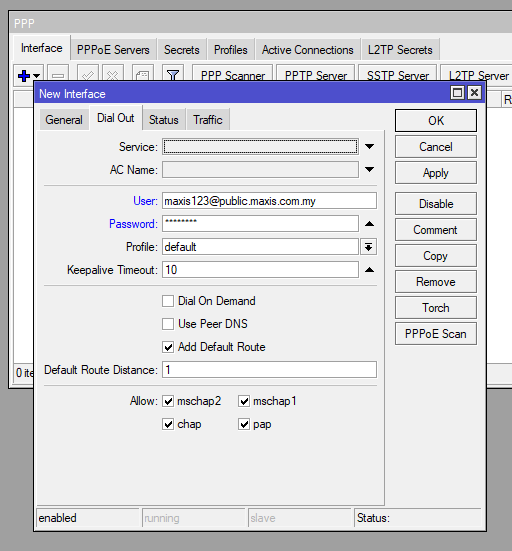
Since you have created VLAN 621 interface earlier, time to create PPPoE
Go to menu: PPP > Interface > + PPPoE Client
Set a name, for now I choose default pppoe-out1 name and choose vlan1.621 as Interface
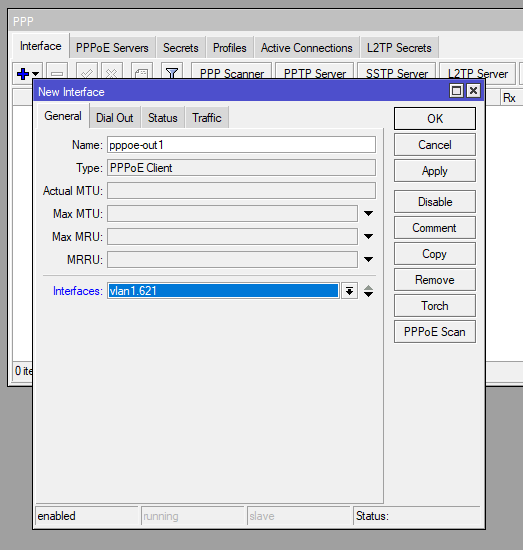
Enter your PPPoE Account, untick Use Peer DNS and click OK:
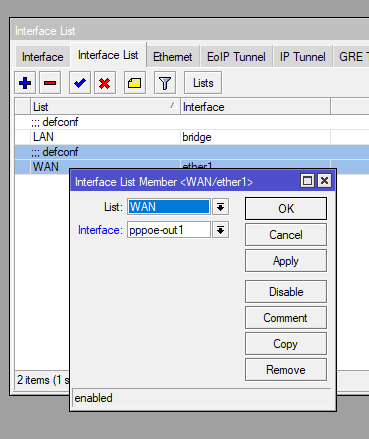
Now PPPoE connected, but need change Interface List WAN to pppoe-out1
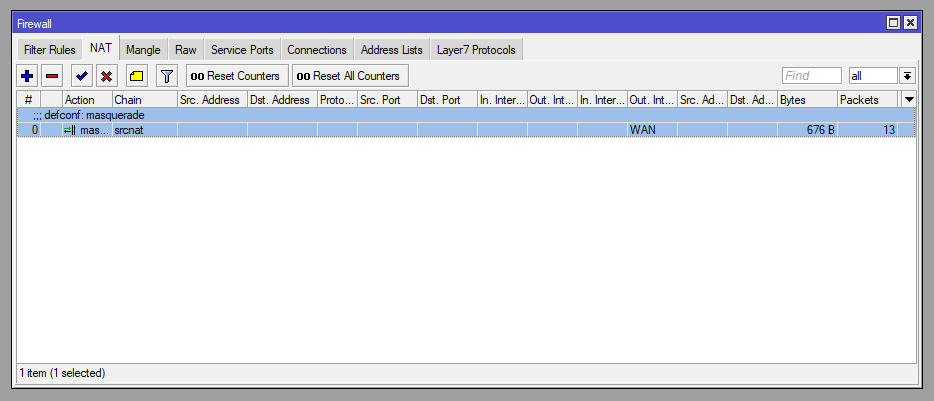
Check Firewall, just in case, masquerade should use WAN as Out Interface List
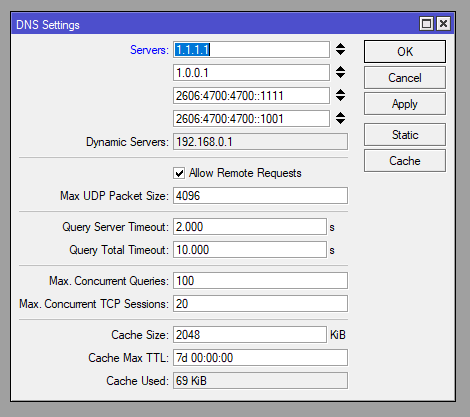
Change DNS
Don’t use ISP DNS, use reliable DNS such as Cloudflare 1.1.1.1 or Google 8.8.8.8
Complete!
Now you have working Fiber Internet, so far I like this router so much, with SFP port, in the future, I will replace Huawei ONT to ONT SFP stick, making Fiber direct connection and save space!
IPv6
Next article, I will show you how to setup simple IPv6 on existing pppoe-out1